|
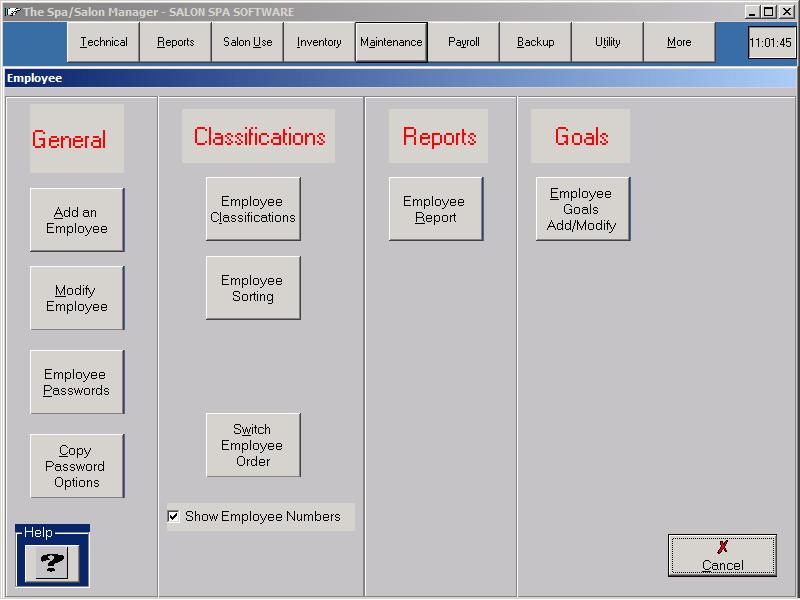
Adding an Employee involves several steps. First determine if you are going to re-use an existing employee's position (who has left your employment) or add an employee. If you have an employee who has left, you can re-use that position and all the ex-employee's information will be gone. How to add an employeeClick More until you see Maintenance. Click Maintenance followed by Employee. Click Add Employee. |
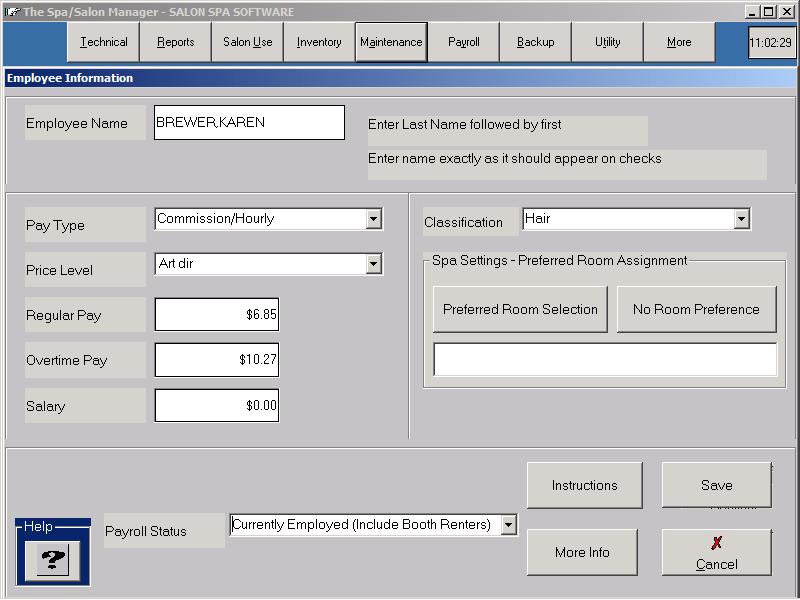
Modify an EmployeeClick More until you see Maintenance. Click Maintenance followed by Employee. Click Modify/Delete Employee. Choose an employee with an asterisk in front of it. Pay TypeDetermine how you are going to pay the employee. If the employee is paid by multiple pay methods, Hourly and Commission, make sure to choose the option showing both pay methods. Price LevelEach employee is assigned a Price Level. The first eight levels are used to determine the standard price for each service. The 9th Price Level is used for employees that should not appear on the appointment book. A warning is displayed each time to remind you of the function of the 9th Price Level. Regular Pay/Overtime PayThe Regular Pay is the hourly pay for the employee. The Overtime Pay, by federal standards is 1½ times the regular pay. If you pay the same amount for regular and overtime, enter the same hourly pay in each blank. Check with your accountant on the legality of this practice. SalaryThe Salary is the amount to be paid during a single pay period. If your pay period is two weeks, the amount typed should be the total salary for the two week period. Payroll StatusThe Payroll Status is how employees are set to, ie: On Payroll, Sick Leave, and Off Payroll. To terminate an employee they should be set to Off Payroll. The employee name will still show in the Employee Maintenance screen, but the name will be proceeded with an asterisks (*). The removed employee will not show on any other screen. ClassificationThe Classification is used to help the selection of employees in the appointment book, time card, and other parts of the program. By classifying your employees, all nail techs can be chosen by clicking on the button Nails. Common classifications include Hair, Nails, Massage, Skin and any other department in your business. Note: An employee can only be classified under one classification. If the employee performs services in two departments you must choose the classification that the employee performs most. Click Save to assign a password for the employee. Password AccessPassword Access is assigned for an employee that you want to access the computer. If you don't want an employee to use the computer, don't enter a password. A simple way to assign passwords is to use the last four digits of the employees social security number.
|

Password LevelThe harder decision is to determine which Password Level to place your new employee. A rule of thumb is to give an employee the lowest access that allows them to complete the job you want them to complete. To understand what each level allows the employee to perform, click the Password Level followed by clicking the Password Level Details. A heading above each box of choices shows the options for Appointment, Sales Options, Receptionist Reports, Management Reports along with Performance Reports. All aspects of the program are shown with a checkmark in front of what the employee would be allowed to perform if that Password Level was chosen. PrinterThe Printer option determines whether the employee can print the reports that you have given them access to via the Password Level. Remember, if you did not give them access to the Mailing Menu, giving them print rights will not give them access printing out a list of clients. Net Payroll Manager Setup - (Optional)Note: You must have purchased the Payroll module to use this feature. Setting an employee up for Net Payroll Calculation is accomplished from the Maintenance Menu followed by the Payroll/Accounting Setup option. Employee Payroll InformationThe Employee Payroll Information records the employee address information which is printed on the payroll check. The system records the employees social security number along with marital status. It is important to enter the correct number of exceptions along with the marital status, since both affect the calculations of taxes. If you do NOT withhold any taxes for the employee check the Treat as 1099 box and no taxes will be withheld for that employee. Number of Pay Periods# of Pay periods are as follows 52 for weekly, 26 for bi-weekly, 24 for bi-monthly and 12 for monthly. Once all of the payroll information is entered, the system prompts to allow any deduction information to be entered for the employee. Deduction information would include additional Federal, Educational Deduction, CAFE or 401K plans. Deduction CategoriesThe following Deduction Categories make the system calculate taxes based upon the deduction name. Those names are CAFE, SEP-IRA and 401K, FEDERAL, STATE and CITY.
Once the payroll Information is entered, the commission information should be entered.
|